
Many years ago I wrote something for ‘Custom PC’ magazine on how to rig up a couple of old analogue meters to a PC. Some of it still exists at the time of writing over at bit-tech (they were bought out by Custom PC magazine) : http://www.bit-tech.net/custompc/howtos/602874/monitor-your-pc-with-an-analogue-meter.html
The original mag article linked to software hosted on another site. I still get traffic and the odd request asking for the software so I’ve decided to dump it all here. There were a couple of programs: A windows .NET app and some Linux C code.
The Windows program doesn’t seem to work any more, at least for me. Windows 7, 64bit and bad programming by myself to blame. I’ve provided full source so someone might be able to recompile if they really, really want to. The Linux code is very simple, plays a tone, pulls in data from /proc/net/dev and then uses amixer to change the volume. It might even still work, I haven’t tested recently.
meter.zip – windows program, including source.
meter.c – linux C code
The original article from the magazine :
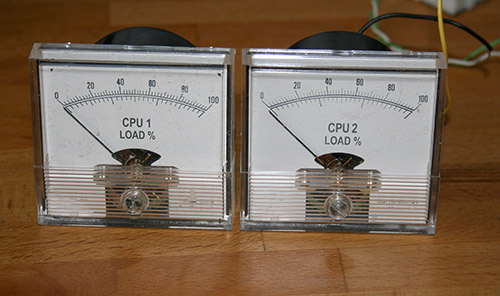
Hands on : Monitor your PC with an Analogue Meter
David Barton shows you how to use an audio signal to monitor anything you like on a retro analogue needle-meter
Okay, we know what you’re thinking haven’t we already done this guide? At first glance, it might look eerily similar to our analogue hard drive meter guide [see Issue 50, p100], but this issue’s guide will show you how to do much more with an analogue meter.
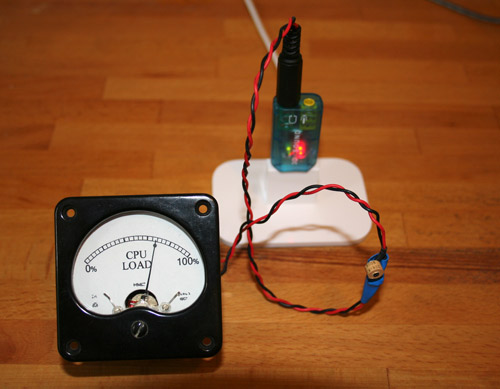
While the previous guide showed you how to monitor your hard drive’s activity with a simple on or off signal, this guide will show you how to monitor pretty much anything on your PC using a variable signal that’s perfect for an old-school analogue needle.
Of course, there are guides on the web that show you how to do this properly, they use pulse width modulation (PWM), PIC micro controllers and various other fancy gubbins connected to custom USB interfaces.
Conversely, the method we explain in this article offers similar results but dispenses with the scary electronics and programming.
Instead it uses plain audio output to drive the meter – just like an old-style vu meter. All we need to do then is write some software to make a noise and then increase / decrease the volume of the noise to move the meter’s needle to show your CPU load, download rate, CPU speed or whatever you fancy.
Sounds simple enough, right?
At the moment, the Windows software (programmed by yours truly) only monitors CPU load, but I plan to add more features at a later date.
Step 1.

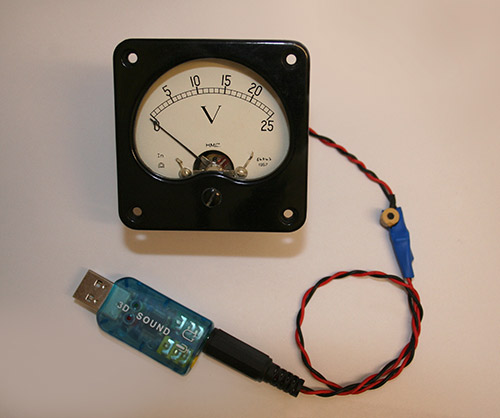
You’ll be using audio to control the meter, so you need a spare audio source. If you’ve added a sound card to your PC, you may well have an on-board audio source that isn’t being used; otherwise you’ll need to add an extra audio device. We found this little USB audio stick, which is perfect for the job, for just ?4 on eBay. After installing this, make sure that your original sound card is set up as the default playback device in the Windows Control Panel.
Step 2.
For the best results, you’ll need to play a constant tone into the meter. Most sound-editing software provides a tone generation facility, but we recommend downloading Audacity for free.
Step 3.

Solder two wires to your 2.5mm jack as shown, with one on the central ground and another to either the left or right channel.
Step 4.
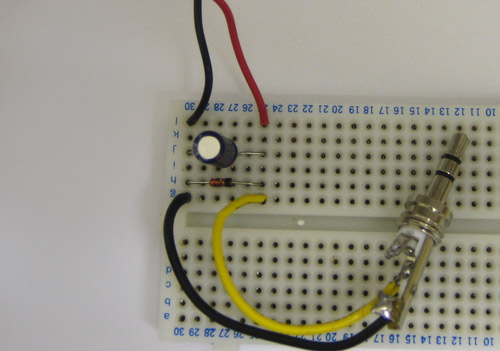
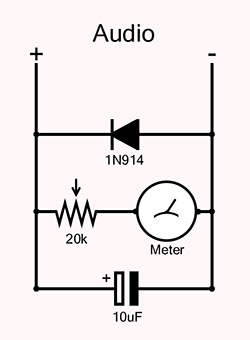
Use your breadboard to test the circuit; this lets you easily swap components around before soldering. Follow the circuit diagram [see opposite] and connect your diode and capacitor as shown, along with the wires connecting to your jack plug, and solder a couple of wires to the positive and negative points on the meter.
Step 5.
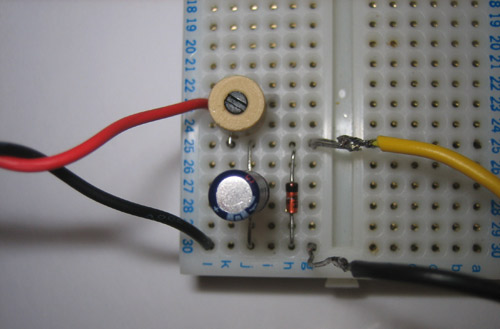
Place either a resistor or a potentiometer between the meter’s positive wire and positive output from the circuit, as shown. Make sure that you also remove any resistors already present in the meter’s casing. After that, plug the jack into your audio source, and you’re ready to test the circuit.
Step 6.
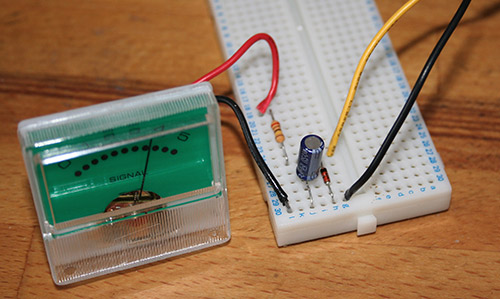
Play the WAV file at full volume, and with a bit of luck the needle should move. At 100% volume you want the gauge to poin to its maximum value, so adjust your potentiometer or change your resistor value until the needle does this. You also want the needle to be roughly somewhere in the middle at 50% volume and at 0 when silent. Keep adjusting your resitor values / potentiometers until you get somewhere near. Depending on your meter, you may find that removing the capacitor and just using a diode and resitor/pt works better.
Step 7.
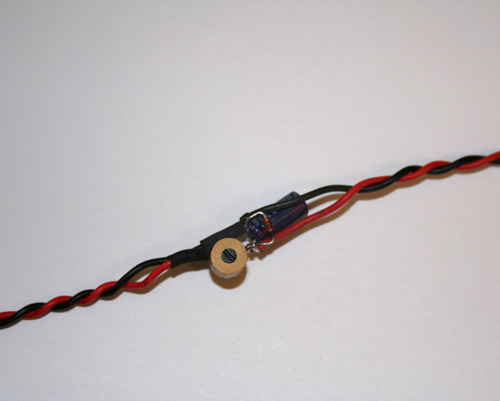
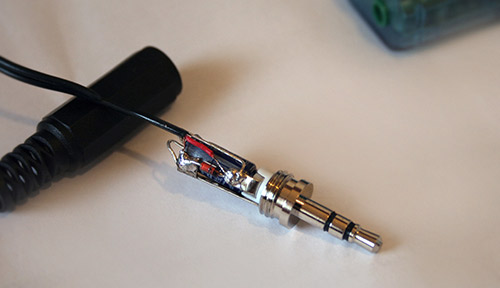
If the circuit works, you can remove the breadboard and solder it together permanently, using heat-shrink to secure the joints. As there are only a few components you can get away leaving it loose with some heat-shrink or if you’re careful even mount the circuit directly on the jack. Alternatively you could mount it in your meter’s casing if there’s room. It’s now time to set up the software and get the needle moving.
Step 8.
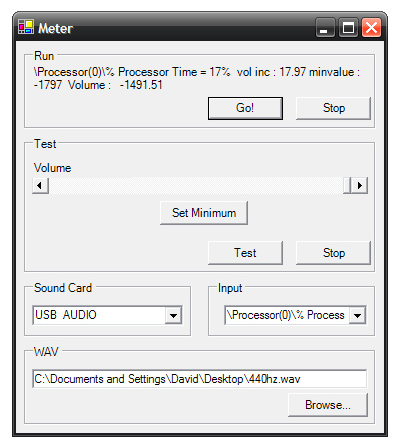
Windows users can download the meter software from http://tinyurl.com/6qyhnb. This is a small .NET application that lets you select a soundcard, a WAV and an input (what the needle measures). It also has a testing option, which plays the WAV repeatedly, so you can manually change the volume for calibration. Linux users can download some C code from http://tinyurl.com/6m6zez. This code changes the volume depending on the network download rate. Compiling instructions are in the text file.
Step 9.
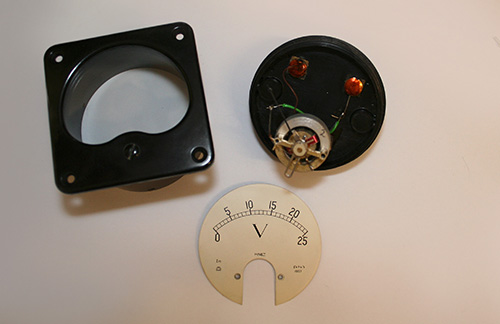
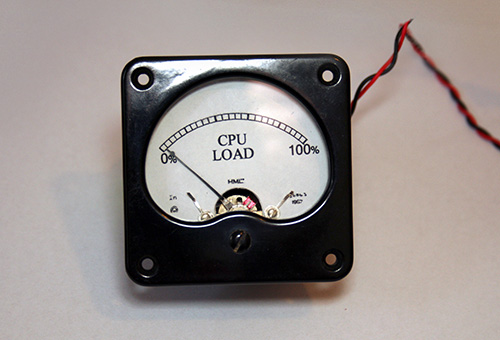
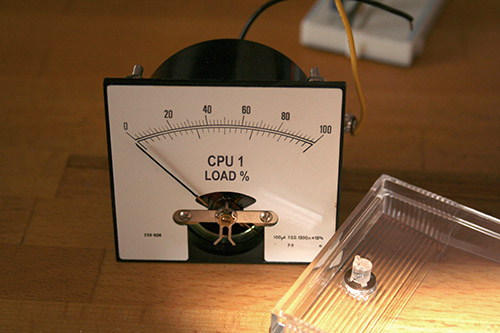
For a final bit of polishing, open up your meter and carefully remove the faceplate. You should be able to flip it over and use the reverse side for your own custom scale. Try scanning the current scale and replacing the text with something more meaningful. If you’re looking to make an accurate scale, remember that the audio output is non-linear (the needle jumps will move further apart with each increment). Refer to out previous analogue hard drive meter guide (see Issue 50, p100) for instructions on adding LEDs to your meter.
Hello. link to software not valid. Please Could you send me the url to download the METER application.
Thank you